Data Cleaning with No Code: Detecting and Fixing Missing Values
Cleaning a dataset eats 40-70% of a project. Finding and fixing missing values in a census dataset with no Python, R or Matlab — just cleaning rules.

DataScience in the Real World
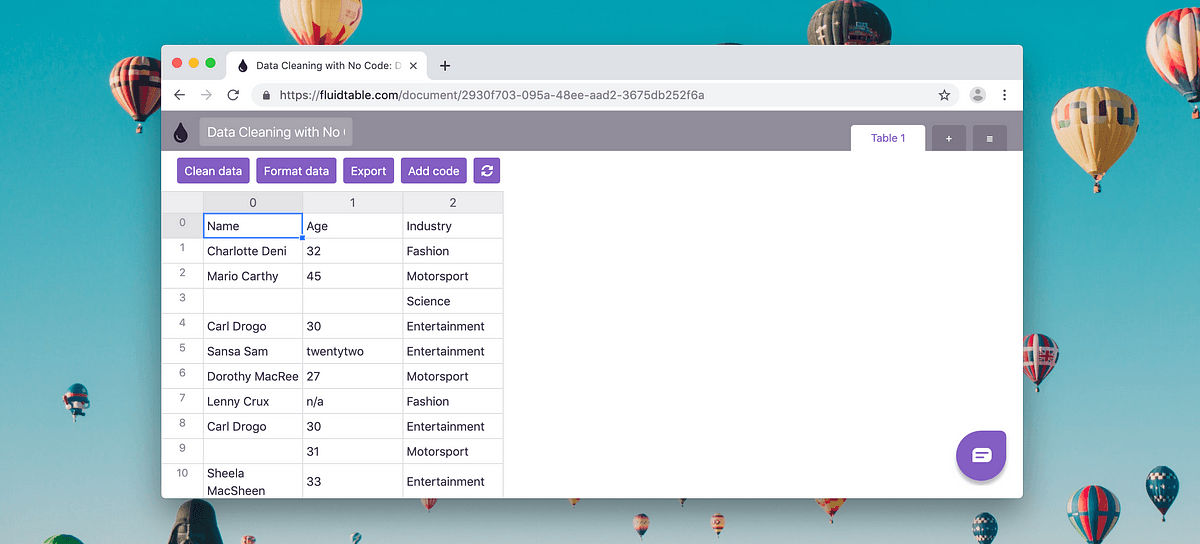
Cleaning up a dataset takes up a serious amount of time. In the past few months, I’ve interviewed about 40 data analysts, financial analysts and data scientists. They reported to me that cleaning datasets take up between 40 and 70% of the time they spend on a project.
My goal is to help you do it as quicky as possible, so you can spend more time analysing the dataset or just go sun-bathing at the beach.
The way I plan to let you reach this goal is by using No Code at all. Python, R, Matlab are very powerful, but they are not easy to learn nor master. So, writing and iterating on the different cleaning scripts becomes a lengthy process.
Clean up the example dataset
Click here to download the example CSV dataset. You are going to work on a simple census dataset, which features name, age and industry.

Import your dataset in Fluidtable
You are going to use Fluidtable to clean up the dataset. It allows you to do powerful cleaning with no code required. Quickly sign up and then, in the Dashboard, you will find a button “Import Excel or CSV”. Upload the example CSV. After the importing process ends, the dataset will be visualised as a table.
Transform the first row in columns names
Select the first row, then right-click on the row header (where the 0 is). And finally click on “Transform in columns names”.

Start cleaning the dataset
On the top left, in the toolbar, there is the button “Clean data”. It will open the Data Cleaner tool.

Once open, you will be able to analyse and clean every single column.
Find and replace missing names
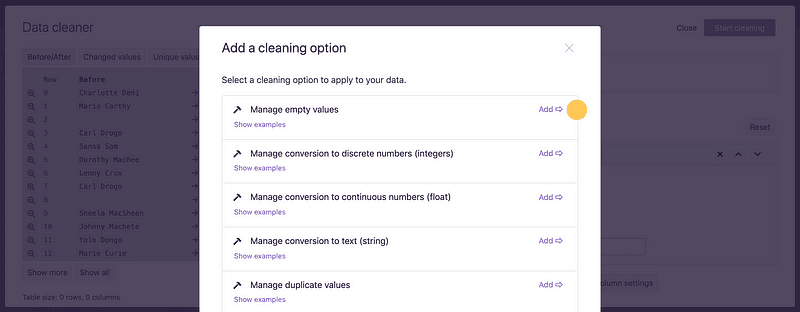
Scroll down the right column, then select “Add a cleaning rule”.

Look for “Manage empty values”, then add it.
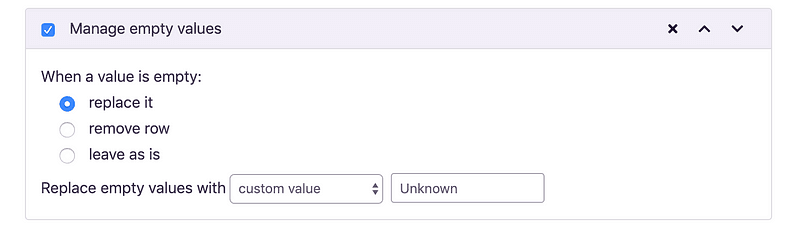
Then set “When a value is empty: replace it”. And “Replace empty values with custom value: Unknown”. Done.
You will see that the preview will be updated immediately. It will showcase the changes on a sample dataset.
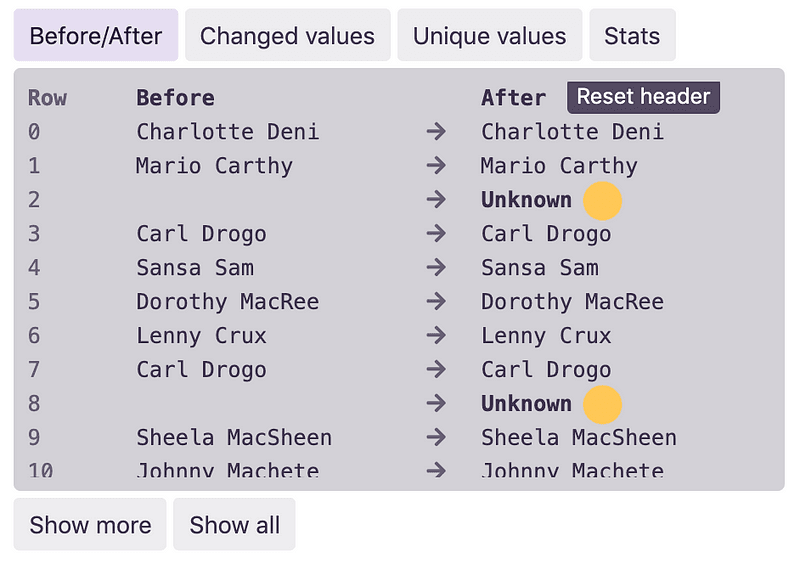
With the buttons on the top, you can:
- choose to see only entries that the cleaner changed
- show only the unique values in the column
- have a quick list of “cleaning” stats
Instead, with the button on the bottom, you can load more or all the data inside the preview.
Remove the row with no age
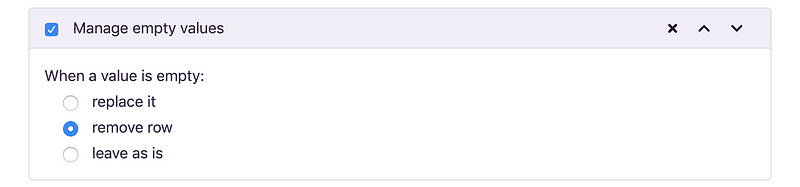
On the top right, you will find the column selector. Select the column “1 (Age)”. You will notice in the preview that several values are missing. For the sake of this example, you determine that the age field is essential. So, you want to remove the rows with an empty value.

Scroll down the right column, then select “Add a cleaning rule”. Look for “Manage empty values”, then add it.
Then set “When a value is empty: remove row”.
Remove rows where the age is not a number
You can add multiple “cleaning options”. They will automatically create a chain of cleaning steps.
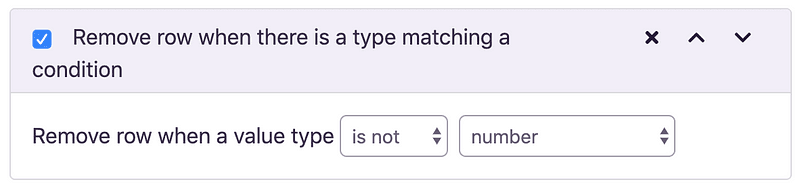
Add another cleaning option to take care of the non-numerical values in the age column. Click again “Add a cleaning rule”, then select “Remove row when there is a type matching condition”. Then confirm that it is configured with “Remove row when a value type is not a number”.
Clean the entire dataset
Until now you’ve been just previewing the changes. Now, click on “Start cleaning” button on the top right.

This will start cleaning the entire dataset, according to the cleaning rules you previously selected, and it will create a new table with the outcome of the cleaning process. To avoid losing precious data, the original uncleaned dataset will be maintained in the initial table, so you can always go back to it.
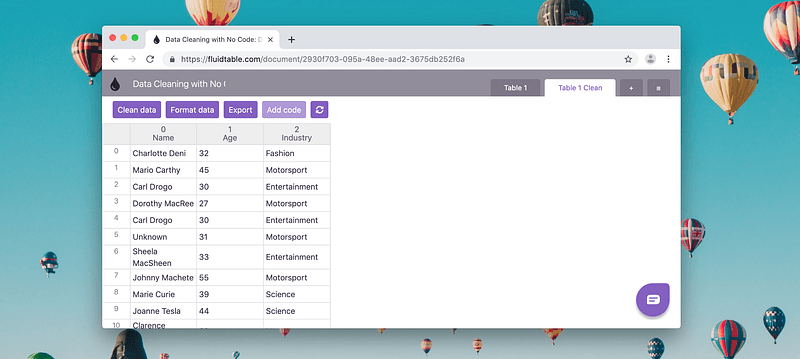
Also, if you go back to the original table and open “Clean data” again, you will find all the previous settings saved. You will be able to quickly change some settings and clean again the entire dataset.
Export
In the toolbar, you find the “Export” button, this allows you to quickly download a CSV or Excel file which you can then analyse with your favourite app.
Conclusion
You saw how to clean your dataset in little time. Go ahead and keep exploring all the cleaning options inside the “Add a cleaning rule” menu.
The best way to discover all the main features, though, is to go to the Dashboard and then start the “Data Cleaning Guided Tutorial”.
Read next
How to Prepare Texts, Reviews, Comments, Tweets for Sentiment Analysis with No-Code
Strip characters, punctuation and stop words, then stem what is left — preparing reviews, comments and tweets for sentiment analysis without any code.
Fluidtable Tutorials and Examples
An index of Fluidtable walkthroughs and worked examples, for working with data in a spreadsheet with less effort than formulas alone allow.
Excel Formulas to Fluidtable Reference Guide
Side-by-side reference from Excel formulas to their Fluidtable equivalents: arithmetic, cell and range lookups, sums, counts, averages and lookups.